Constructing Rectangles with Constant Perimeter and Constant Area
In the fall of 2023, I taught a geometry methods course at City College here in New York. While my goal was to make use of Web Sketchpad throughout the semester, I knew that the most effective use of the software required activities that coupled it with hands-on modeling. Two such opportunities arose with the Constant Perimeter and Constant Area Rectangle activities that follow.
Constant Perimeter Rectangles
The supplies for this lesson were simple—a box of spaghetti, some large sheets of paper, and tape. I divided the students into pairs and gave each pair four strands of spaghetti. I asked them to take two of the strands (all of which were the same length) and use them to build a rectangle with perimeter equal to the combined lengths of both strands. Students could, of course, snap their spaghetti into smaller pieces. With the remaining two spaghetti strands, they were to build a second rectangle with the same perimeter, but different dimensions. To save their work, students taped the rectangles onto the paper.
As the class surveyed everyone’s rectangles, they noticed that nearly everyone employed the same construction strategy: Hold two spaghetti strands so that their ends meet and snap them both at the same random location. This yields four strands in all, with two of the equal-length strands becoming the length of the rectangle and the other two becoming the width.
It was here that I introduced the term constant-perimeter rectangle: A rectangle whose dimensions can change, but whose perimeter is constant. The rectangles constructed by my students were a small sampling of constant-perimeter rectangles whose perimeter was equal to the combined lengths of two spaghetti strands. Could we, I asked, adapt their method to Web Sketchpad, using the software to construct a seemingly infinite number of rectangles which all shared a common perimeter?
We began by constructing a segment AB and placing a point P on the segment that could move anywhere along it. This segment represented a single spaghetti strand, with point P as the location where it was snapped in two.

In prior weeks, students had plenty of practice with Web Sketchpad’s compass tools, so modeling a constant-perimeter rectangle with lengths AP and PB was something they could do without directions. Pages 1 and 2 of the Web Sketchpad model (and here) below show two of the students’ constructions. Page 3 of the model is blank so that you can try building either construction yourself.
I cannot overstate the satisfaction and empowerment that students felt when they dragged point P of their constructions and viewed a continuum of rectangles sharing the same perimeter. Beginning with the physical model both primed students for the mathematics of the Sketchpad construction task and gave them an appreciation for just how amazing it was that they could effortlessly generate constant-perimeter rectangles without building them one by one.
(As a side note, later in the semester when we explored the two-pins-and-string method for constructing an ellipse, it was a breeze for students to model it with Web Sketchpad because the construction technique builds so naturally on the constant-perimeter model. And the constant-perimeter rectangle construction is perfect for exploring the question of which rectangle with a perimeter of, say, 12 cm., has the largest area?)
Constant Area Rectangles
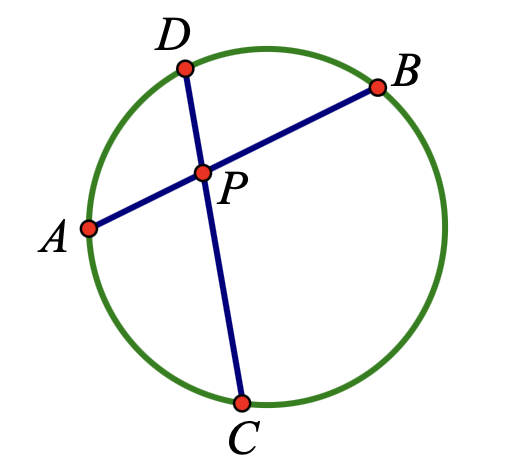
When we concluded the constant-perimeter rectangle investigation, I asked the class if they could think of a way to construct a constant-area rectangle—a rectangle whose dimensions could change, but area was constant. The students tossed around some ideas, but kept it as an open question. I promised we’d revisit constant-area rectangles a few weeks later when we investigated the power of a point theorem. In the picture below, point P is a random point in the circle, and AB and CD are two random chords passing through P. With a simple application of similar triangles, we proved the power of a point result, namely that AP · PB = CP · PD.
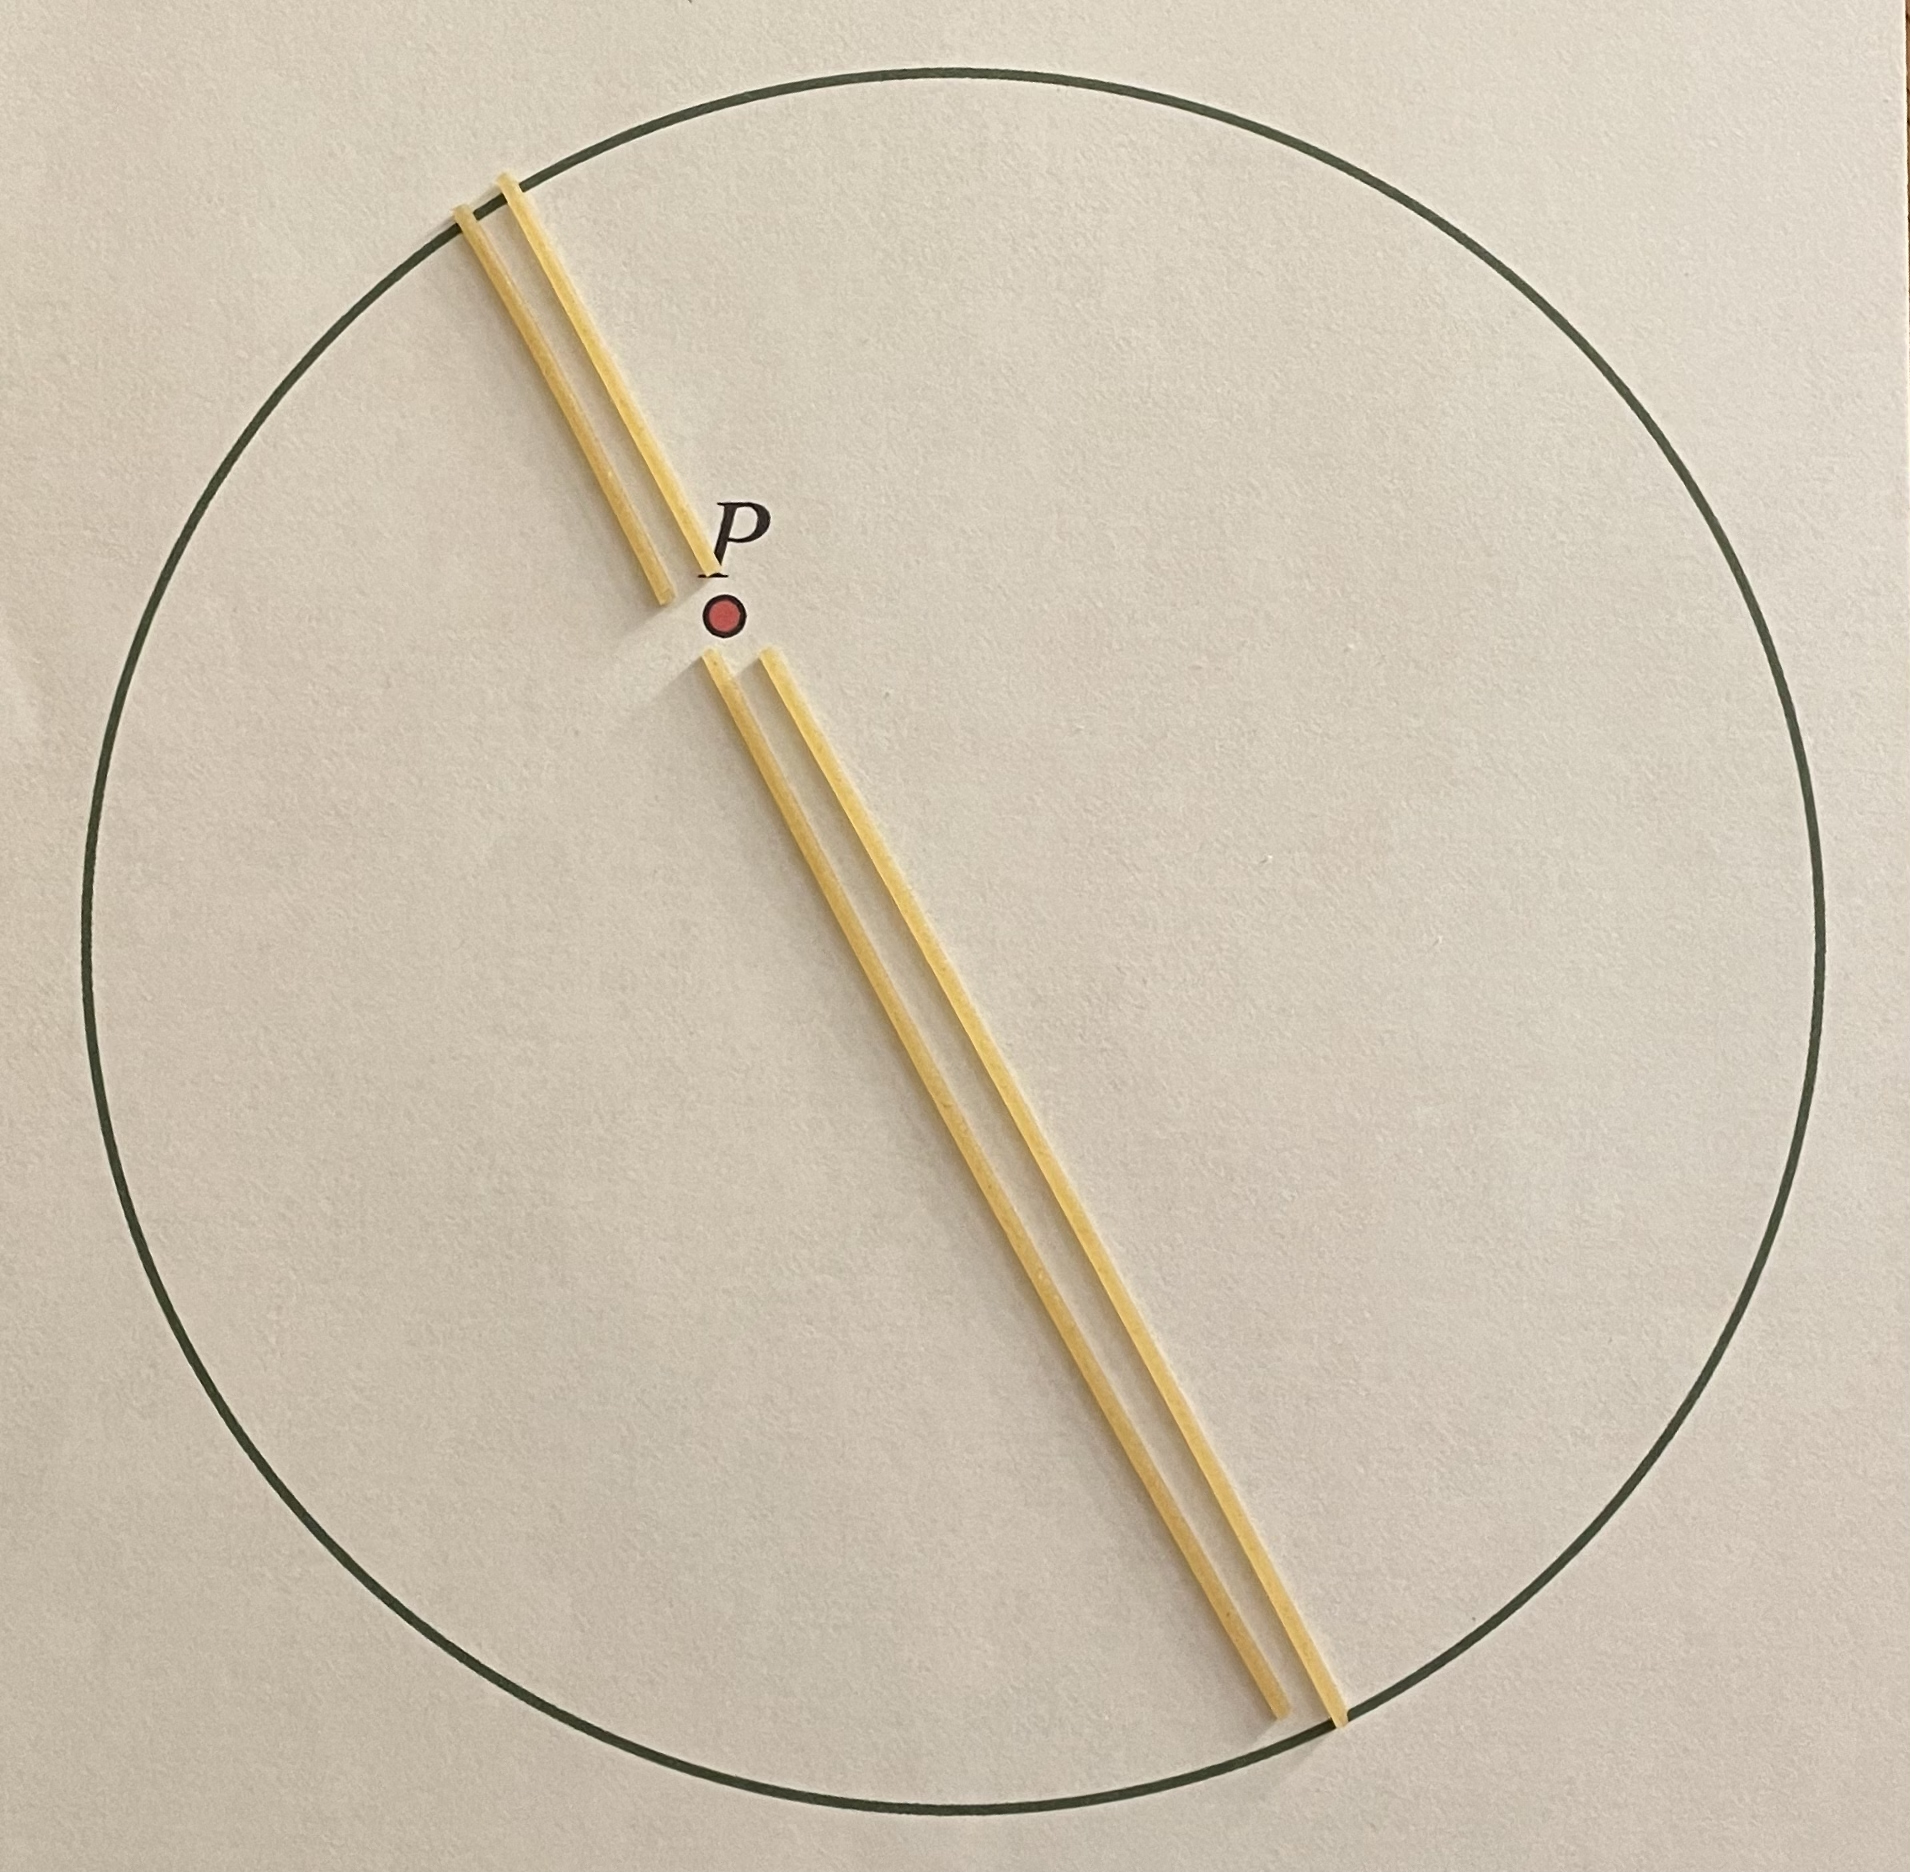
As a next step, I gave each pair of students four spaghetti strands and a paper circle with a point P inside it. The task was a clear continuation of the work from several weeks earlier: Use the four strands to construct two rectangles, each with different dimensions but the same area.
A typical student solution was to take two spaghetti strands aligned end to end and place them on the circle so that they passed through point P. Then, snap off one or both ends of the spaghetti so that the strands form a chord passing through point P. Snap both strands at point P to form four pieces—two of which are the length of a rectangle and two of which are its width (see below). Repeat this process with the remaining two spaghetti strands, but pick a different chord of the circle (still passing through P) so that the new rectangle has the same area but different dimensions.
As earlier, I asked students if they could adapt their hands-on method to Web Sketchpad, using the software to construct a seemingly infinite number of rectangles all of which shared the same area. This did not prove easy. I think students got stuck on the idea that they needed to construct two chords of a circle and did not recast the power of a point theorem in its dynamic geometry form: Start with a circle. Pick any point P inside it. Construct a chord AB that passes through point P. Spin the chord so that point A travels around the circle, with the chord always passing through point P. For every location of point A on the circle, the product of AP and PB will be the same.
As a by-product of the construction above, a rectangle formed with lengths AP and PB will maintain its area as the chord spins around the circle. (See below (and here) for the completed model. You can build it yourself on page 2.)
Students noted that this construction, while satisfying, did have a limitation: It did not include “super skinny” rectangles that shared the same area as the other rectangles. To be more inclusive, we investigated one other method for constructing constant-area rectangles, described here.